PFSense
Steps:
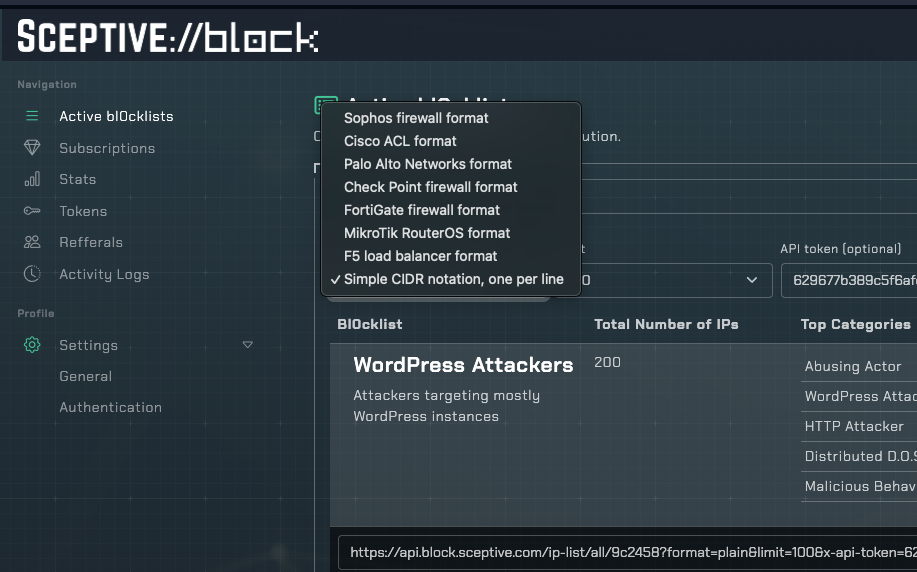
In your Sceptive bl0ck dashboard, navigate to Active bl0cklists and select Cisco ACL format.
Creating the alias in pfSense
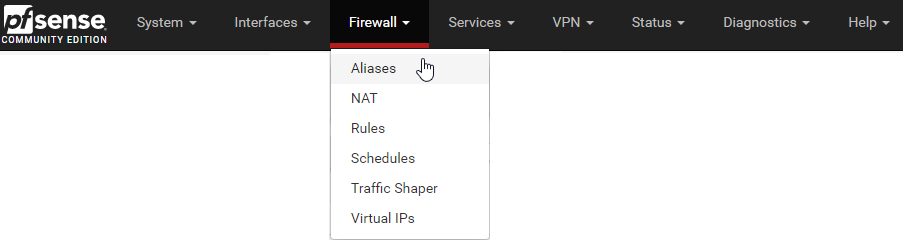
Start by going to Firewall - Alias in the top menu
Then click "Add" at the bottom of the alias list.
I called my new alias bl0cklist. Type is URL Table (IPs). At the field URL Table (IPs)
I entered
https://api.block.sceptive.com/ip-list/all/9c2458?format=plain&limit=10000&x-api-token=...
The number in the field after / is how often pfsense will download the file. One time every day isn't often enough but it is a good start.
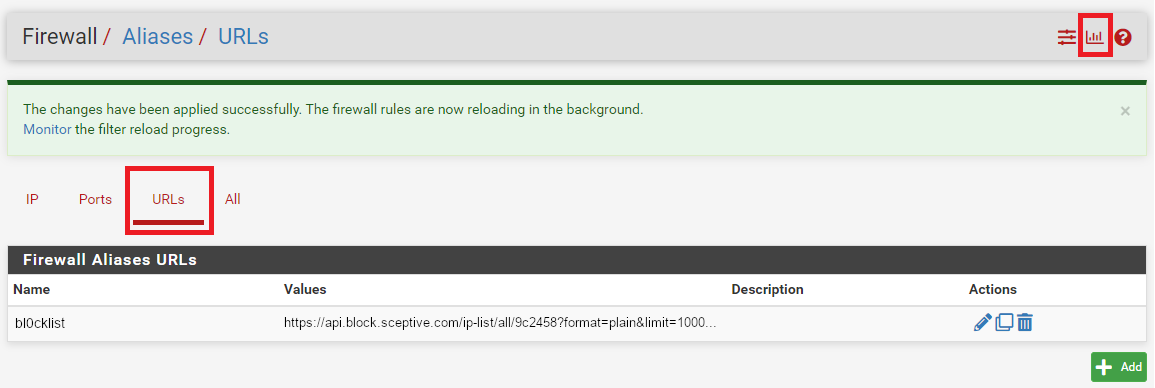
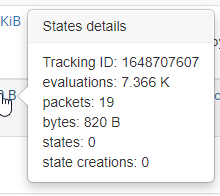
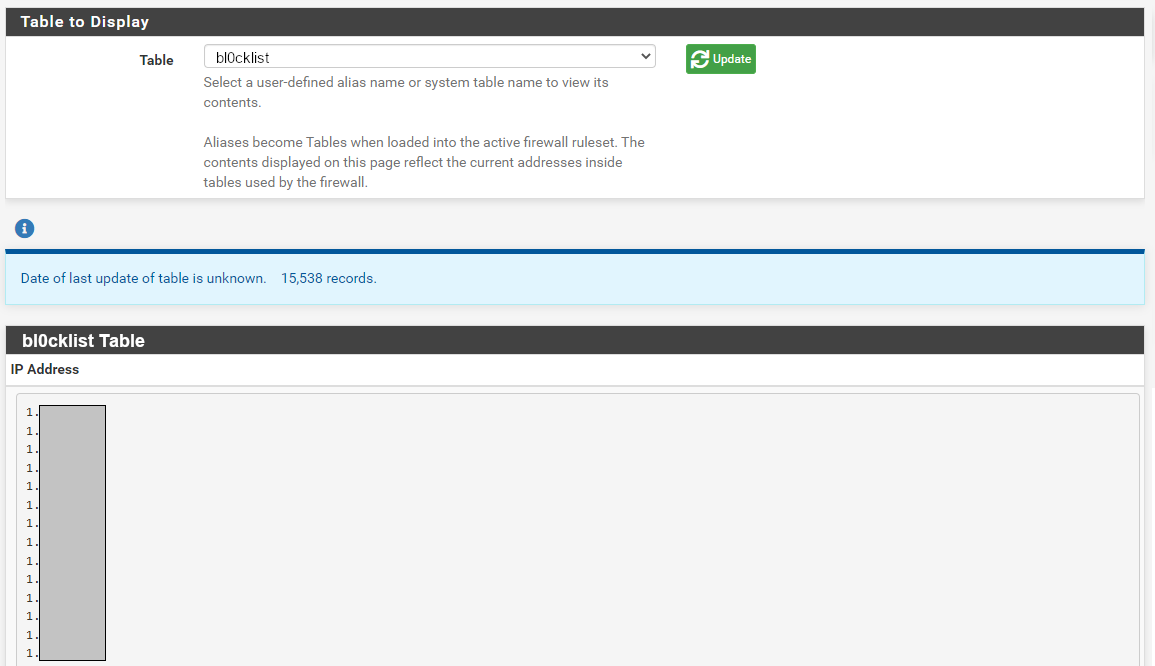
To verify that pfsense loaded your list click on the graph looking icon in the top right. That takes you to to diagnostics. Select the bl0cklist from the drop down menu.
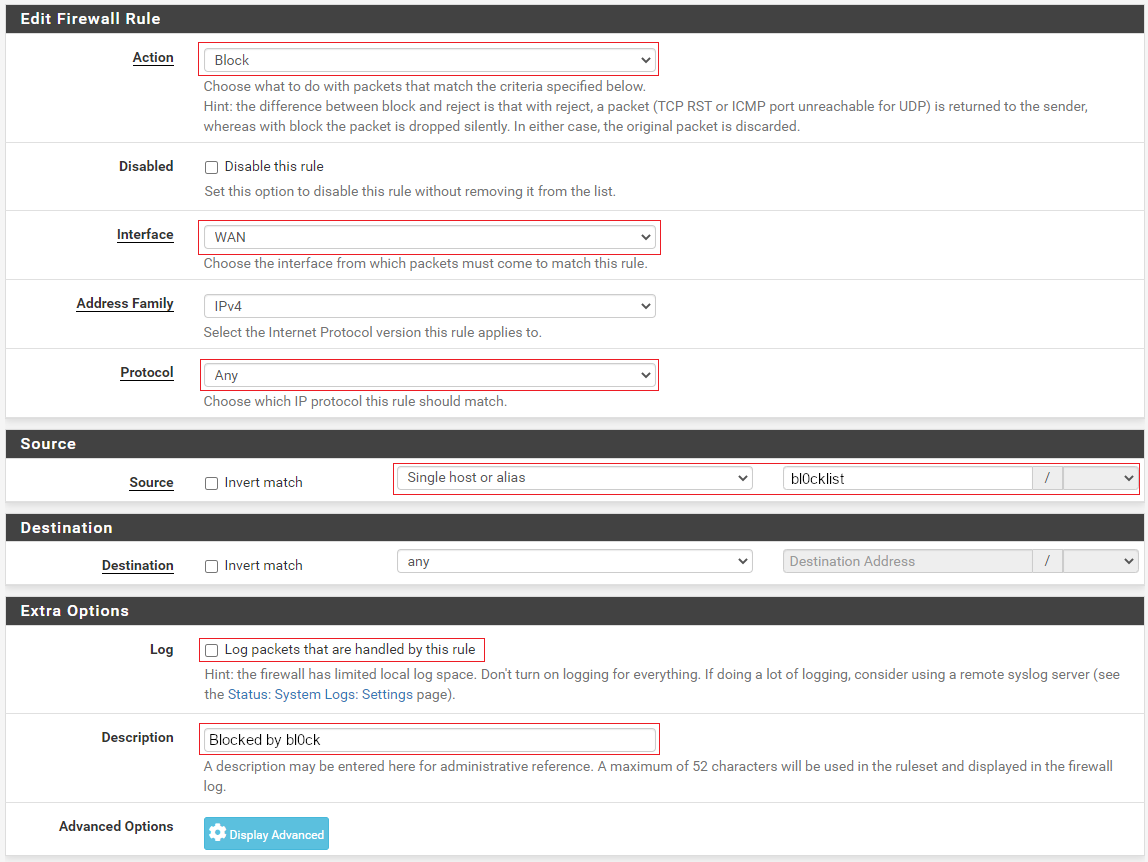
Then go to Firewall - Rules and then make sure you are on the tab WAN. At the end of the page click the add button with an up arrow to add a rule at the top of the list.
Select Block as action, WAN interface, Any protocol. In source select Single host or alias and start writing bl0ck and it suggests the full name of your alias. I suggest that you give the rule a description logging and future reference.
If you want logging of everything that get blocked check Log Packets before you save.
After saving the rule click activate changes.

After activating changes you can track package amount have been blocked by the rule.